Lucky Mandala 3D Layered
Crafting is no longer just about flat surfaces and simple shapes. It is about creating depth, dimension, and an experience that draws the viewer in. The Lucky Mandala 3D Layered SVG cut file represents a sophisticated approach to digital crafting, offering creators a versatile template that transforms from a simple graphic into a striking three-dimensional artwork. Whether you are a seasoned woodworker, a paper craft enthusiast, or a small business owner looking for unique home decor items, this design provides a perfect balance of geometric precision and organic interpretation.
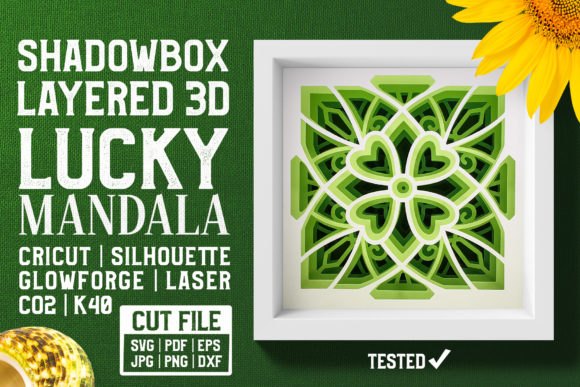
What makes the Lucky Mandala 3D Layered truly special is its chameleon-like quality. The central motif is not locked into a single identity; instead, it invites the creator to decide its meaning. Depending on the materials used and the perspective from which it is viewed, the middle design can be interpreted as a four-leaf clover symbolizing luck, a delicate flower with four petals representing growth, or even a pair of hearts signifying love and connection. This ambiguity is not a flaw but a feature, allowing you to tailor the final piece to your specific audience or personal aesthetic without needing to alter the core file.
Understanding the Design Architecture
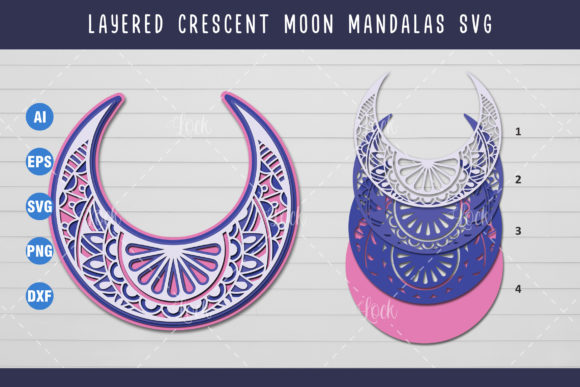
At its core, the Lucky Mandala 3D Layered Shadow Box SVG Cut File is engineered for complexity and visual impact. It consists of a 6-layer design, which might sound intricate, but the structure is intuitive once you understand how the layers interact. Each layer serves a specific purpose in building the overall composition, from the background framing elements to the focal point in the center. The beauty of this multi-layered approach lies in the negative space. As light passes through the gaps between the stacked layers, it creates dynamic shadows that change throughout the day, adding a living quality to the static object.
The design is compatible with a wide range of digital cutting machines, including Cricut, Silhouette, and other computer-controlled plotters. Because it is provided as an SVG file, it scales perfectly regardless of the size you wish to produce. You can create a miniature desktop ornament or a large wall-mounted statement piece, and the vector paths will remain crisp and clean. This scalability is crucial for entrepreneurs who want to offer custom sizes to clients or hobbyists who want to experiment with different proportions before committing to expensive materials.
Material Choices Define the Aesthetic
One of the most exciting aspects of working with the Lucky Mandala 3D Layered file is the freedom to choose your medium. The choice of material fundamentally changes the mood and application of the finished product. For instance, using cardstock or heavy paper yields a lightweight, colorful result that is perfect for parties, gifts, or temporary displays. The soft edges and matte finish of paper create a warm, inviting atmosphere. In contrast, cutting the same design from plywood or MDF gives the mandala a sturdy, rustic, or modern industrial feel. Wood adds weight and permanence, making it ideal for permanent home decor or high-end retail displays.
Another popular option is using acrylic sheets. Acrylic introduces transparency and refraction, allowing light to pass through the layers in complex ways. When combined with LED lighting, acrylic versions of the Lucky Mandala become glowing lightboxes that serve as stunning nightlights or ambient decor pieces. You can also mix materials, such as pairing a wooden frame with translucent vellum layers, to create a hybrid effect that combines texture with ethereal light diffusion. The key is to select materials that complement the intended interpretation of the central motif—warm woods for the heart interpretation, vibrant colors for the flower, and green tones for the clover.
Step-by-Step Assembly Guide
Creating a successful 3D layered project requires patience and attention to detail. The process begins after you have purchased and downloaded the digital file. First, upload the SVG format into your preferred cutting software, such as Cricut Design Space, Silhouette Studio, or Adobe Illustrator. Ensure that the layers are separated correctly; the file should come organized with distinct layers for each part of the mandala. If the layers are grouped, ungroup them and label them clearly to avoid confusion during the cutting phase.
- Prepare Your Materials: Load your chosen material—be it cardstock, plywood, or acrylic—into your cutting machine. Make sure to adjust the blade depth and pressure settings according to the material thickness. For wood, a deeper cut and higher force are necessary, while paper requires minimal pressure to prevent tearing.
- Cut Each Layer: Run the cutting job for each layer individually. This allows you to inspect the cuts immediately and remove any debris or weak points before moving on. Be careful when removing delicate inner pieces, especially from the central motif, as these areas often have the smallest gaps.
- Stack and Align: This is the most critical step. Use the guide provided with the file to determine the correct order of stacking. Typically, the largest background layers go at the bottom, followed by progressively smaller layers, ending with the central design. Misalignment here can ruin the symmetry of the mandala.
- Create Depth: To achieve the true 3D effect, you must leave space between each layer. For paper crafts, use double-sided foam dots, adhesive tabs, or thick double-sided tape. These spacers ensure that the layers do not touch, allowing shadows to form beneath each tier. For wood or acrylic projects, you can use acrylic stands, foam spacers, or even small wooden blocks glued to the back of each layer to maintain consistent height.
- Assemble with Care: Apply your adhesive sparingly to avoid seepage, which can mar the appearance of the material. Press firmly to secure each layer, checking alignment frequently. Avoid using liquid glue directly between layers if you want to preserve height; glue tends to flatten the stack and can warp thin materials like cardstock.
Enhancing the Final Presentation
Once the layers are stacked, you have two primary options for presentation: displaying it as a standalone shadow box or framing it. A dedicated shadow box frame with sufficient depth is often the best choice because it protects the artwork and provides a clean border that emphasizes the layers. However, the Lucky Mandala 3D Layered also looks stunning when mounted directly onto a contrasting background board within a standard frame. This technique can add a pop of color or texture behind the mandala, enhancing the visibility of the negative space.
Lighting plays a pivotal role in showcasing the 3D aspect of the design. Placing an LED strip light around the perimeter of the shadow box or inside the frame casts dramatic shadows that accentuate the contours of the mandala. This is particularly effective for the acrylic or wood variations, where the interplay of light and dark reveals the intricacy of the cut lines. Consider experimenting with colored lights to match the theme—soft white for elegance, blue for tranquility, or red for passion.
Applications for Creators and Entrepreneurs
For those looking to monetize their skills, the Lucky Mandala 3D Layered offers numerous opportunities. It is an excellent candidate for Etsy shops targeting customers interested in boho decor, wedding favors, or personalized gifts. The ability to interpret the central design as a clover, flower, or heart means you can market the same product to different niches. For example, promote the clover version as a St. Patrick’s Day decoration or a general good luck charm, while the heart version appeals to Valentine’s Day shoppers.
Educators and makerspaces can also utilize this design to teach principles of geometry, spatial reasoning, and assembly techniques. The structured nature of the layers provides a clear learning path for students, demonstrating how individual components combine to form a cohesive whole. By encouraging students to experiment with different materials, they learn about the properties of various mediums and how they affect the final outcome.
Ultimately, the success of your Lucky Mandala 3D Layered project depends on your willingness to experiment. Don’t be afraid to try unconventional materials or color combinations. The design is robust enough to handle creative deviations while maintaining its structural integrity. By following the assembly guidelines and paying close attention to spacing and alignment, you can produce professional-quality results that inspire awe and admiration. Whether for personal enjoyment or commercial gain, this digital file provides a solid foundation for creating memorable, dimensional art that stands out in a crowded world of flat designs.