3D Easter Egg: A Versatile Digital Craft Solution
Easter is a holiday defined by tradition, color, and the joy of discovery. While the hunt for hidden treats is a beloved activity, the decorations that frame this celebration often tell their own story. Enter the 3D Easter Egg, a design concept that has revolutionized how crafters, interior designers, and small business owners approach seasonal decor. Unlike flat, two-dimensional cutouts that lie limp on a table or wall, a 3D Easter egg utilizes layered depth to create visual interest, texture, and a sense of permanence. This article explores the nuances of creating these intricate designs, the materials required to bring them to life, and the technical considerations necessary for success.
The Appeal of Layered Depth in Seasonal Decor
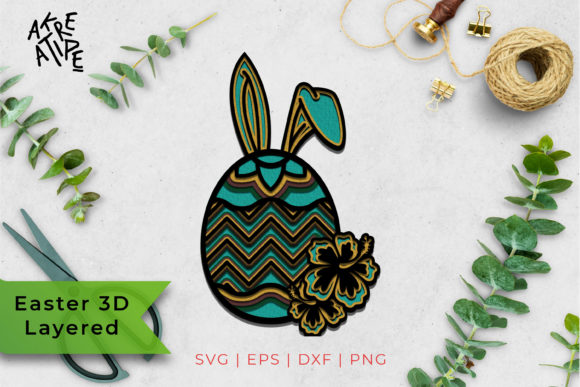
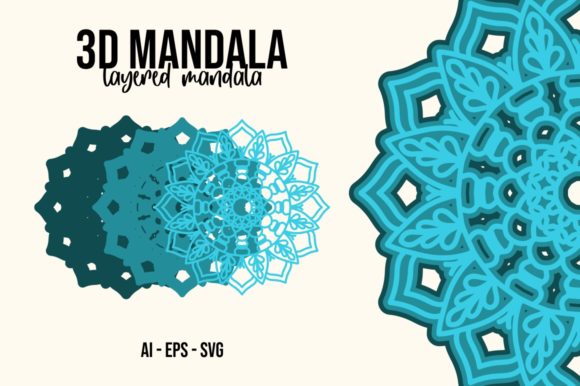
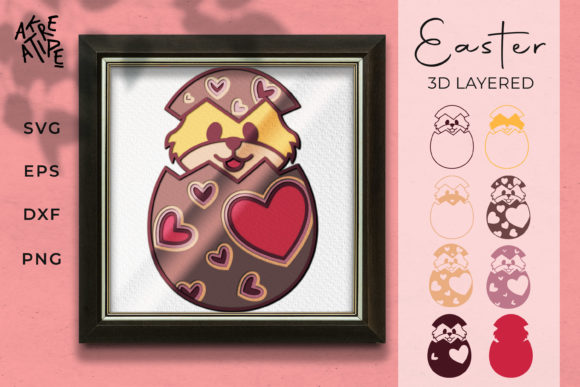
The primary characteristic that sets a 3D Easter egg apart from standard holiday graphics is its dimensionality. By stacking multiple layers of material—each with varying degrees of detail—the final product gains shadows, highlights, and physical presence. This makes it an ideal choice for gifts, home decorations, and signs for special days. The visual impact is immediate; the eye is drawn to the complexity of the layers, transforming a simple egg shape into a piece of art.
Furthermore, the versatility of the design allows for personalization. The colors displayed on the screen are merely an example. Creators can change the color palette to match any aesthetic, from pastel spring tones to bold, modern contrasts. Whether you are aiming for a rustic farmhouse look or a sleek contemporary vibe, the structure of the 3D Easter egg adapts to your vision. It serves not just as a decoration, but as a statement piece that elevates the atmosphere of any room during the spring season.
Material Selection and Preparation
To achieve the best results with a 3D Easter egg design, selecting the right materials is crucial. The integrity of the layered effect depends heavily on the stiffness and finish of the substrate. Below are recommended materials for cutting wood, cardstock, plywood, MDF, paper, cardboard, acrylic, and others.
- Cardstock (65lb): This is a popular choice for beginners and hobbyists. It holds its shape well, is easy to cut, and provides a smooth surface for painting or staining. However, it requires careful handling to prevent tearing.
- Plywood and MDF: For a more durable, long-lasting decoration, wood-based materials are excellent. Plywood offers natural grain beauty, while MDF provides a uniform surface that takes paint exceptionally well. These materials add weight and stability, making them perfect for freestanding displays.
- Acrylic: For a modern, glossy finish, acrylic sheets offer transparency and vibrancy. They are durable and weather-resistant, making them suitable for both indoor and outdoor use if properly sealed.
- Paper and Cardboard: While less durable than wood or acrylic, these materials are cost-effective and ideal for quick projects or children’s activities. They allow for intricate details without requiring heavy-duty machinery.
Regardless of the material chosen, preparation is key. Ensure your mat has not lost its tackiness. This is a common pitfall in laser cutting and vinyl crafting. If the adhesive on your cutting mat weakens, the cardstock or thin material may lift during the cutting process. When this happens, the result is often a torn edge or a misaligned layer, ruining the intricate setting custom for layers with a lot of detail. Regularly cleaning your mat with mild soap and water or replacing it when necessary will ensure crisp, clean cuts every time.
Technical Compatibility and File Formats
One of the significant advantages of purchasing a digital cut file set is the flexibility it offers across different software platforms. Not all creators use the same tools, so compatibility is essential. The following overview outlines which file formats work best with specific programs:
- DXF – Silhouette Studio Basic Free Edition: If you are using the free version of Silhouette Studio, the DXF format is your go-to. It is widely supported and allows for basic editing and scaling within the software.
- SVG – Silhouette Studio Designer Paid Edition, Cricut Design Space, Make the Cut, Sure Cuts A Lot, Brother Scan N Cut: SVG files are vector-based and retain their quality at any size. They are compatible with most paid design suites and popular cutting machines like Cricut. This format is preferred for its precision and ease of manipulation.
- EPS – Adobe Illustrator, Corel Draw, Inkscape, and more: EPS files are industry-standard vector files. They are ideal for professional designers who need advanced editing capabilities. Inkscape, a free alternative to Illustrator, also supports EPS, making it accessible to a wider audience.
- PNG for printing and other software programs: PNG files are raster images with transparent backgrounds. They are perfect for printing directly onto paper or for use in graphic design software that does not support vector editing. Each layered file is provided as a separate PNG for maximum clarity.
This listing contains an SVG, EPS, DXF for hand-cutters, and a PNG of each layered file in 1 zipped file. This comprehensive package ensures that whether you are a laser cutter enthusiast, a manual crafter, or a digital designer, you have the resources needed to execute the project successfully.
Important Considerations for Iron-On Transfers
While the 3D Easter egg is primarily designed for structural assembly, some users may wish to incorporate iron-on transfers for added texture or color. If you plan to use heat transfer vinyl or iron-on paper, please remember to follow the directions on your transfer paper strictly. One critical step often overlooked is clicking the “flip horizontal” button before finalizing your print job. Failure to mirror the image will result in reversed text or designs, which can be frustrating to correct after the material has been cut. Always perform a test run on scrap material to ensure your settings are correct.
Who Benefits from This Design?
The target audience for this 3D Easter egg design is diverse. Small business owners can use these decorations to enhance their storefronts or sell handmade items at local markets. Teachers and parents can engage children in educational activities, teaching them about geometry, patience, and creativity. Interior decorators can use the larger wooden versions as focal points in living rooms or entryways, adding a touch of seasonal cheer that lasts beyond the holiday itself.
For professionals, the ability to customize the design means they can brand their products or align them with specific client themes. The modular nature of the layers allows for experimentation with color combinations and material mixes, fostering innovation in craft production.
Final Thoughts and Practical Expectations
It is important to note that this is a DIGITAL product – no physical items will be sent to you. You are purchasing the blueprint for creation, not the finished object. This empowers you to produce as many copies as you need, reducing waste and allowing for bulk production if desired. The responsibility lies with the creator to source materials, operate machinery, and assemble the layers.
Success with the 3D Easter egg relies on attention to detail. Take your time with the assembly process. Use strong adhesives suitable for your chosen material, and ensure each layer is perfectly aligned before applying the next. The reward is a stunning, three-dimensional piece that captures the spirit of Easter through craftsmanship and design. By understanding the materials, software requirements, and assembly techniques outlined here, you are well-equipped to bring this vibrant design to life.
Whether you are decorating your home, preparing gifts for loved ones, or expanding your craft business inventory, the 3D Easter egg offers a blend of aesthetic appeal and functional versatility. Embrace the creative process, experiment with colors, and enjoy the satisfaction of building something beautiful from scratch.